Update: pytorch is discontinuing support for conda, and recommends using pip instead. So this set of instructions is outdated. and you need to adapt. The informatics cluster system has changed a little as well, so that will need a bit more adaptation.
This post is the sequence of steps I took to set up machine learning on the School of Informatics Research and Training cluster. If you are trying to set up your ML training on the GPU cluster for the first time, this may be useful. The main setup problem I faced was access to the GPU. It happens frequently that without proper configuration, python/pytorch cannot access the GPU for computations. So this post will focus on that.
Initial steps
Step 0. learn Linux shell and read about the cluster. If you are not familiar with using the command line and bash shell in linux find a tutorial online. Try them out on a Linux computer first. Then look through the Informatics instructions guide on getting started with the cluster. Also read the GPU cluster tips, Beginner Guide and Cluster Quickstart. In the following I would discuss getting started. In general, follow the guidelines online and try to release any resources you are not using.
Step 1. Get access to Research and Teaching Cluster. I use the cluster from outside the University (or on a laptop) often, so I have the Informatics openvpn service. See setup instructions here. Other Remote working options are here. I turn the Vpn on only when I need it. When it is on, I am effectively “Inside” the Informatics network.
First, it is best to check that you can access informatics computers:
ssh rsarkar@staff.ssh.inf.ed.ac.uk
(students should use student.ssh). Next, log out of it and log into the cluster:
ssh rsarkar@mlp.inf.ed.ac.uk
This takes me to the cluster head:

If the login does not work, and you believe you do not have access to the cluster, first check with other students in your research group to see that you are doing everything right. Then ask your supervisor to request access for you.
I also use an ftp/sftp client with a GUI to easily transfer files from my computer.
Step 2 [This step may not be suitable is you are not using conda. Pytorch is no longer supporting it…]. Install Miniconda using the command line instructions here. You will need the “…conda init bash” command at the end, since the cluster uses the bash shell mostly. Conda is the system to use python and python packages.
Log out and log in. Then run bash.
Check that you can run the command conda. I have things set up so that .bashrc runs at login and I do not have to run bash separately. Search online on how to do that.
Step 3. We need to check that we can access the cluster nodes with GPU. At this point, let us get those useful informatics scripts. I created a folder called scripts and put all of them there via ftp (may be easiest via git pull). Then I made them executable and put the folder into the PATH, so that I can run the scripts easily. I have moved the example experiment projects out into a different folder.
To make sure that you can run tasks with GPU allocation, run
interactive_gpu
This is one of those useful scripts, and creates a session with a GPU:
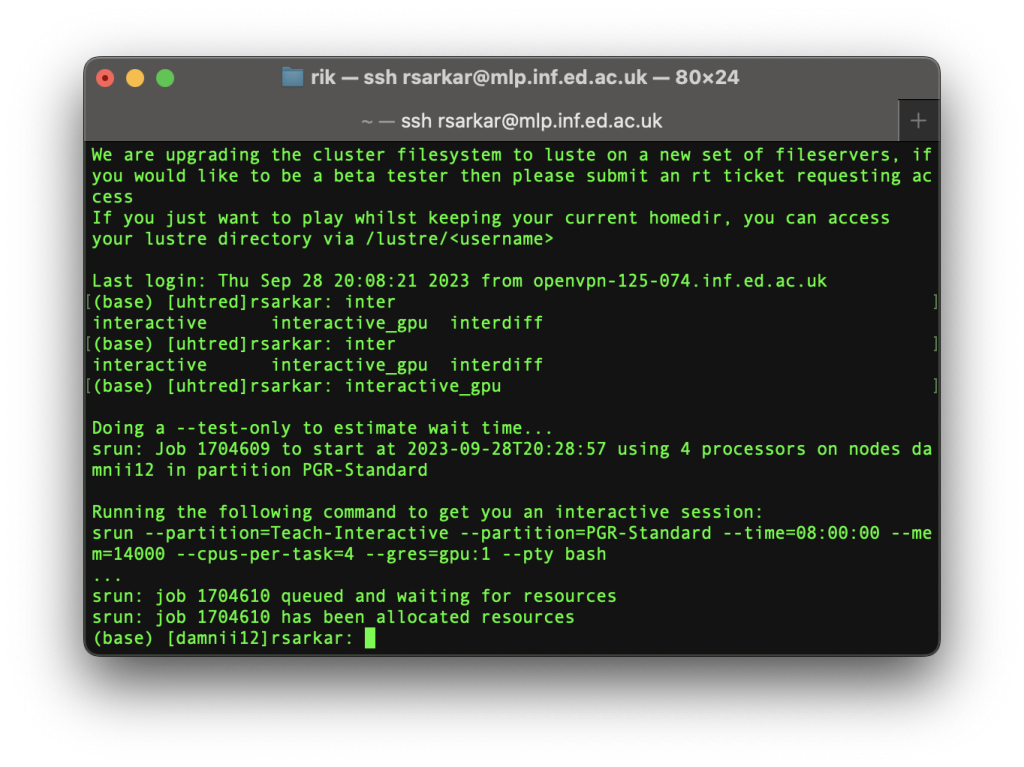
Observe that:
- It takes a bit of time for the resources — mainly the GPU for a certain duration to be requested and allocated
- It has dropped me to a different machine called damnii12 on the cluster that has GPUs
Now, anything I run in this session will have access to GPU resources for the next 8 hours. If I leave this session, I will request resources again for a new session. If you leave a session — intentionally or accidentally — make sure to release resources. E.g. run killmyjobs to kill all your running jobs.
Install pytorch and CUDA
Step 4. Set up a conda environment for pytorch. Conda allows different software environments (e.g. for different projects). This managing environments page is worth bookmarking. I set up and activated an environment called ptcdc:
conda create --name ptcdc
conda activate ptcdc
This step and the following are best to run from inside an interactive gpu session like the one we created above.
Step 5. Install pytorch and CUDA The Informatics guidelines have instructions for this. but when I tried it, I (and the software) had difficulty finding right GPU information. This is one of the reasons for running from inside an interactive gpu session.
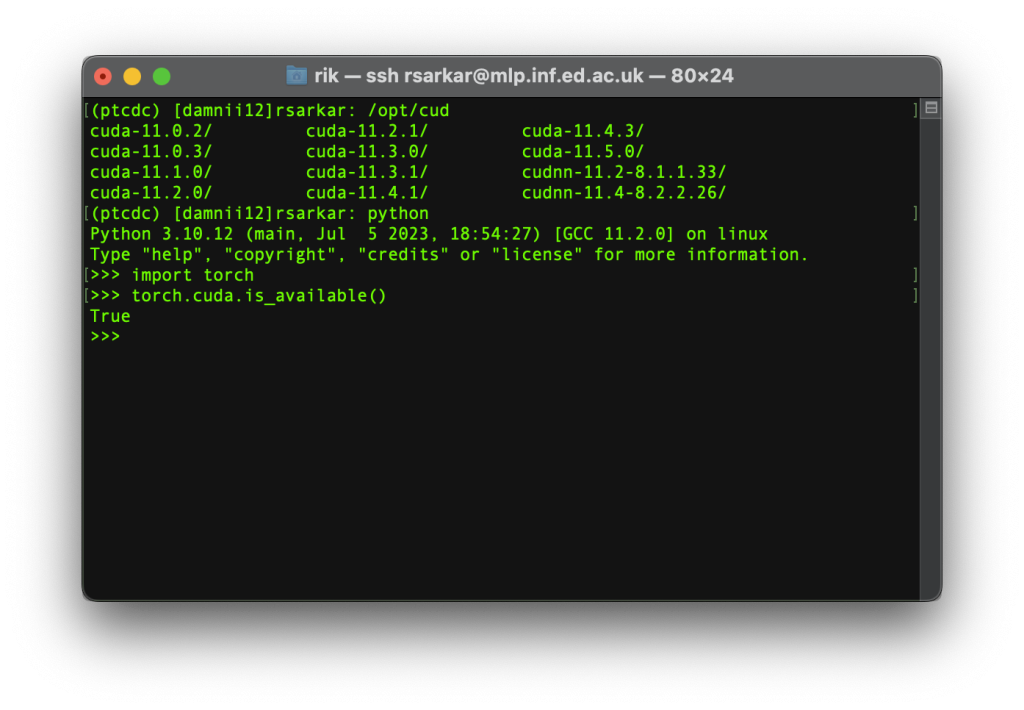
5.1 Type
/opt/cud
and press <TAB>. (This step was supposed to work from the head node, but seems to work only from a gpu node.)

The screen shows the various CUDA versions present in the system. We need to install pytorch and cudatoolkit versions that are consistent with one of these. This is the tricky step.
If you simply install pytorch and cudatoolkit, that will install the latest versions of those packages, with no guarantees of consistency with themselves or the system. In fact, after a few false starts, I realised that it was confidently installing the CPU versions instead of GPU versions!
5.2The way to find and install the right things is to look at the previous versions page for pytorch, which has nice comprehensive commands for installing consistent pytorch and cuda. The command I tried and got to work was:
conda install pytorch==1.12.1 torchvision==0.13.1 torchaudio==0.12.1 cudatoolkit=11.3 -c pytorch
By now there are newer versions that you can use. This installation takes a while. After you run it, wait a bit. It may ask you to confirm that you are ok to install a bunch of packages and dependencies. Say yes, and then you are free to move away while it installs. It used to take a long time, but more recently I found that it installed in about 15 minutes. Your time may vary.
Warning: If you are connected via VPN from outside, the long install time may be a problem. Since if you lose connection (even due to VPN failure), the install will fail midway, which could be a pain. I had run the install from my office computer inside the University. Other alternative is to run the command in a way that allows you to leave the session. Search how to do that. Give suitable options to the conda install command so that it does not need confirmation.
Testing
Step 6. Test that python and cuda work. After installation is done, and you are in a GPU session with ptcdc (or your environment name) activated, try:
python
>>>import torch
>>>torch.cuda.is_available()
Step 7.Test batch processing works. Batch processing is how we submit jobs to the cluster. First, exit the interactive gpu session. Now you will be back in the head node. Activate your conda environment with pytorch if it is not already active. You can try the various examples on the beginner guide etc. Or you can try the following. Learn to use an editor like pico, if you have not used command line editors before.
7.1 Create and move to a suitable directory. Then create a file called test-cuda.py:
import sys
import os
import argparse
import torch
import torch.nn as nn
import torch.nn.functional as F
import torch.optim as optim
from torchvision import datasets, transforms

use_cuda = torch.cuda.is_available()
print('cuda:',use_cuda)
if not use_cuda:
    raise ValueError('You wanted to use cuda but it is not available. '
                        'Check nvidia-smi and your configuration. If you do '
                        'not want to use cuda, pass the --no-cuda flag.')
device = torch.device("cuda" if use_cuda else "cpu")
print(f'Using device: {torch.cuda.get_device_name()}')
7.2Create a shell script that runs this as a GPU batch job. Call it cudatest.sh:
#!/bin/bash
#SBATCH --gres=gpu:1
#SBATCH --output=output.txt

python test-cuda.py
7.3 Run the script using sbatch:
sbatch cudatest.sh
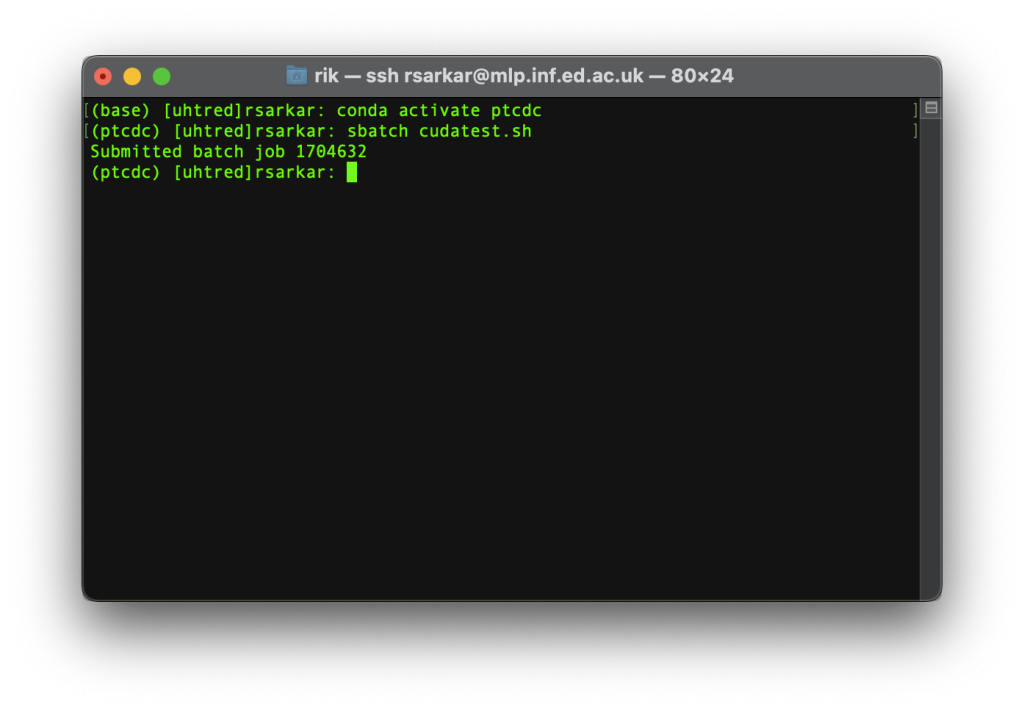
The output should go to output.txt. Check the file.
Step 8 Try one of the given examples in the script repo. Add some print commands to print time and see how long each epoch is taking.
Additional tips on files and programming.
Writing code, moving files to the cluster etc is an annoyance. It is possible to use GUI sftp tools, or sshfs file systems that mount a remote filesystem so that it feels like a local filesystem.
A great tool here is Visual Studio Code. It is currently the most popular code editor and has many awesome plugins. Install the remote SSH plugin. With this setup, VS code itself can connect directly to the cluster and lets you edit files as if they were local files. It also opens terminals within vs code, so when it is time to run commands, that is just a click/keystroke and you will not need another terminal or ssh connection.
VS code has many great plugins including autocomplete etc.